Vue Router学习(一)
前言
单页应用 vs 多页应用

以我的博客为例,很多网站会有这样的布局,头部会有一个导航栏,每次点击页面会切换。
如果是多页应用MPA(Mutiple Page Application)的话,就是每一个导航是一个html,比如我的博客,导航里有5项,那么就有5个html,每次点击,都进行了html切换,每次都要加载新的html。
如果是单页应用,就只有一个html,没有导航切换的时候只是切换html页面内容,不会切换html。
多页应用
多页应用的优点是首次页面加载时间快,SEO效果好,缺点是页面切换慢。
因为多页应用是把系统分成很多个html,所以每次加载只加载了一个html,所以首次页面加载快。
SEO指搜索引擎优化,它是一种通过分析搜索引擎的排名规律,了解各种搜索引擎怎样进行搜索、怎样抓取互联网页面、怎样确定特定关键词的搜索结果排名的技术。
多页应用的内容基本都是直接写在html页面,这样搜索引擎就比较好好识别,所以seo排名效果好。
页面切换慢的原因是因为没有切换页面,都要重新请求html,相当于重新渲染页面,渲染整颗DOM树。
单页应用
单页Web应用(single page web application,SPA)无疑是目前网站开发技术的弄潮儿,很多传统网站都在或者已经转型为单页Web应用 —《单页Web应用:JavaScript从前端到后端》
单页应用相对于多页应用,比较明显的优点就是切换页面时间比较快,因为单页应用切换不需要重新请求html,它只是重新渲染dom树的其中一部分。但是因为单页应用把所有的内容都放到一个html里,所以他的首次加载页面时间会相对来说比较慢,要加载的内容比较多,而且一般单页应用的内容主要通过js去切换渲染,所以内容都是动态生成,不是直接写在html里,所以seo效果比较差。
搭建一个项目的时候到底是用多页面还是单页,这需要根据具体情况去分析。
Vue Router是什么?
官方解释什么是Vue Router
Vue Router 是 Vue.js 官方的路由管理器。它和 Vue.js 的核心深度集成,让构建单页面应用变得易如反掌。包含的功能有:
- 嵌套的路由/视图表
- 模块化的、基于组件的路由配置
- 路由参数、查询、通配符
- 基于 Vue.js 过渡系统的视图过渡效果
- 细粒度的导航控制
- 带有自动激活的 CSS class 的链接
- HTML5 历史模式或 hash 模式,在 IE9 中自动降级
- 自定义的滚动条行为
为什么要用Vue Router?
在单页应用中所有的东西都在一个html页面中,我们进行页面切换需要用到路由。
怎么用Vue Router?
一个简单的单页面应用
下面介绍的是vue-cli2.0下怎么用Vue Router
首先我们先安装一下vue-cli2.0
可以看到,我们安装vue-cli 模版的时候可以选择安不安装Vue-Router,在这边我们选择yes。
项目创建完成后我们看下src\main.js
1 | // The Vue build version to load with the `import` command |
首先我们把src\App.vue这个文件加上一个导航nav
1 | <template> |
我们可以看到两个比较特殊的标签<router-link></router-link>,<router-view/>
<router-link>主要是用来做页面跳转的,一般写导航,<router-link>里的组件会渲染到<router-view/>
我们一个导航项创建一个组件,所以我们在src\components\下创建五个组件,分别是home.vue, achives.vue, categories.vue, tags.vue, about.vue
Vue Router 给我们设置了高亮的样式router-link-exact-active,所以我们可以设置一个选中颜色。
1 | .fd-header-item:hover, .router-link-exact-active{ |
router-link里的to参数代表着你要跳转的路径,我们可以看下src\Router\index.js
在这个js中我们引入了这五个组件,然后写了它们相应的路由
1 | import Vue from 'vue' |
我们看下这个home.vue,在点击home时我们显示I am Home ,其他几个页面相应的会输出。
1 | <template> |

到此一个简单单页面应用的基本框架就算搭好了。在此之中我们接触到了三个很类似的单词:route,routes,router。
route他是一条路由,比如home这个a标签链接指向home页面的内容。
routes是一组路由,也就是由route组成的一组数组
router是一个机制,路由机制。
多级导航(嵌套路由)
需求描述
现在在Achives导航下有两个二级导航achives1和achives2,点击Achives1和Achives2分别跳转到相应的页面。
实现思路
- 在src/component下创建两个子页面achives1.vu和achives2.vue
- 在src/router/index.js里配置子路由
- 在archives.vue写上
<router-view/> - 在App.vue里写Achives点击事件,点击后出现二级导航
实现过程
创建了两个子页面
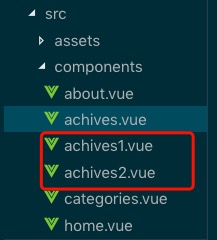
achives1.vue页面如下
1 | <template> |
src/router/index.js
1 | { |
可以看到我们在achives的路由中加了一个children属性,这个属性是一个数组,然后有两项,也就是我们的两个子页面的路由,相应的path是路径,component是组件,所以我们要在src/router/index.js里引入这两个组件
1 | import achives1 from '@/components/achives1' |
在父页面achives.vue
1 | <template> |
最后我们只要在App.vue添加相应的点击事件和router-link
参考
- 《单页Web应用:JavaScript从前端到后端》